To Aveva System Platform
The Aveva System Platform solution allows you to create an OPC-UA service to provide access to System Platform objects.
Configure the OPC-UA Service
To configure an OPC-UA server on your Galaxy:
-
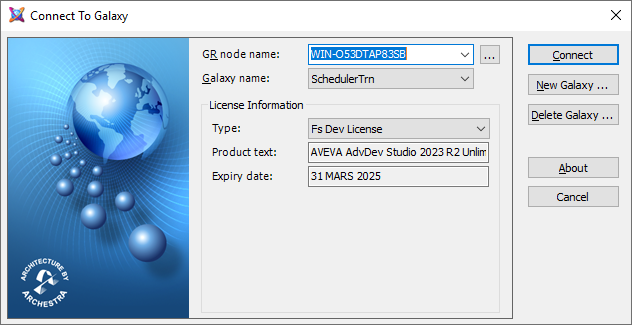
Launch the Aveva IDE

-
Connect to the Galaxy
-
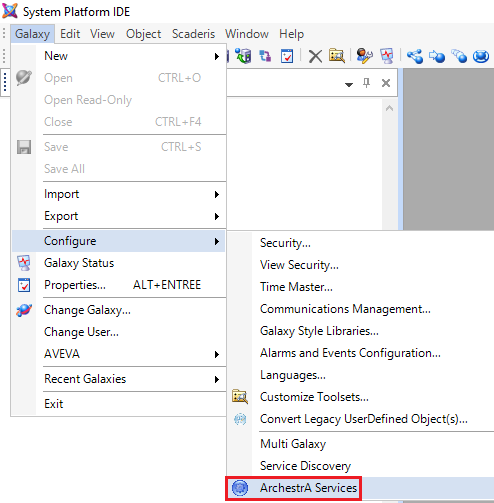
Go to the Galaxy menu > Configure > Archestra Services
-
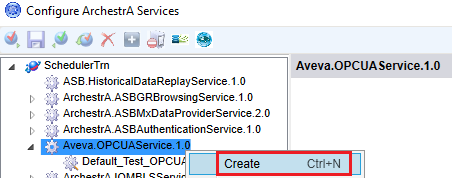
Navigate through the service tree and create a new OPC-UA service
-
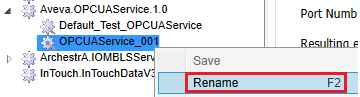
Rename the service (e.g.: OPCUAService_ScaderisScheduler)

-
Configure the OPC-UA server port
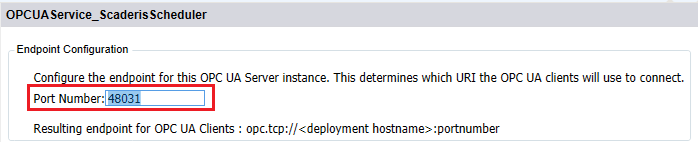
-
It is highly recommended to keep this configuration option to ensure encrypted communication
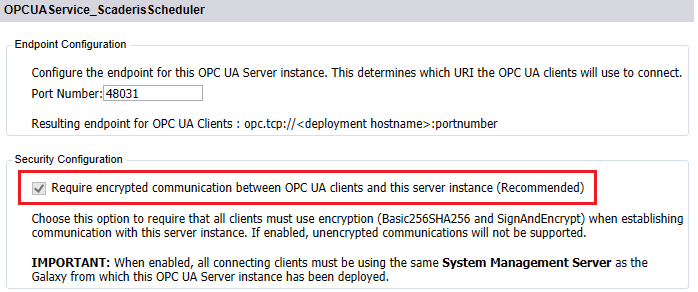
-
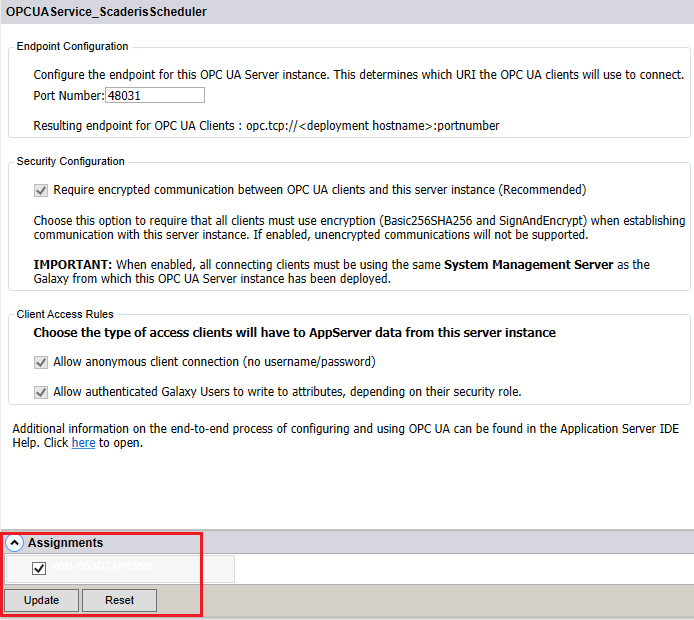
Select the following options

-
In the "Assignments" section, select the platform(s) on which the OPC-UA server will be deployed
-
Then click "Update"
-
Deploy the Aveva System Platform OPC-UA service
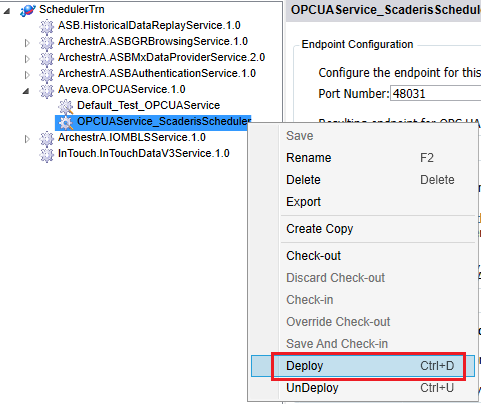
-
The following message appears at the bottom left of the service configuration screen if the OPC-UA server is created successfully. Otherwise, launch the SMC to analyze potential deployment errors.

SMC Log:

Test the OPC-UA Connection and Approve the System Platform OPC-UA Certificate
To test the connection to the System Platform OPC-UA server, we recommend using the UAExpert software, which is an OPC-UA client on the machine hosting the "Scheduler Processor" solution. It can be downloaded from the following address: https://www.unified-automation.com/products/development-tools/uaexpert.html
To configure the connection in UAExpert:
-
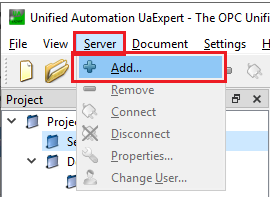
Click on the "Server" menu, then "Add"
-
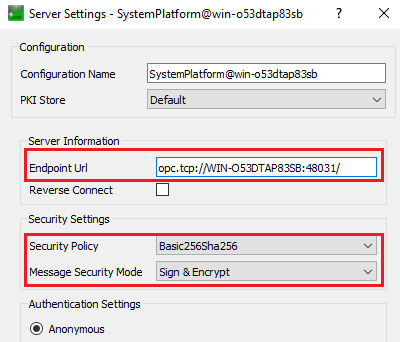
In the "Configuration Name" field, enter a name for the connection
-
Click on the "Advanced" tab
-
In the "Endpoint Url" field, enter the OPC-UA server address as displayed in the SMC during the OPC-UA service deployment
-
In the "Security Policy" field, select "Basic256Sha256"
-
In the "Message security mode" field, select "Sign & Encrypt"
-
In the "Authentication settings" section, select "Anonymous"
-
Click "Ok"
-
Connect to the OPC-UA server

-
On first connection, a security error appears in the UAExpert client logs and a certificate is generated in the C:\ProgramData\AVEVA\PCS\OPC UA Rejected Client Certificates\certs directory


-
Move this certificate to the machine running the UA Expert solution (the one hosting the "Scheduler Processor" solution)
-
Right-click, then "Install Certificate"

-
Select "Local Machine"

-
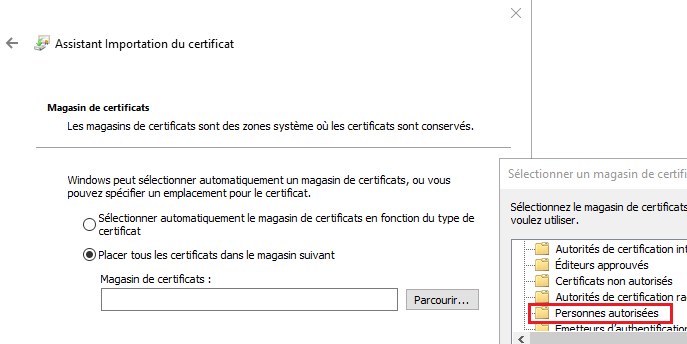
Select the option "Place all certificates in the following store"
-
Select "Trusted People"
-
Click "Next"
-
Click "Finish"
-
The following message appears

-
Renew the connection from UAExpert
-
The following message should appear in the UAExpert client logs. Otherwise, check the Aveva System Platform logs via the SMC.

-
It is now possible to explore System Platform objects via the UA Expert client

Create an OPC-UA Client Connection to the System Platform
To create an OPC-UA client connection to the System Platform:
-
Connect to the Scheduler Dashboard
-
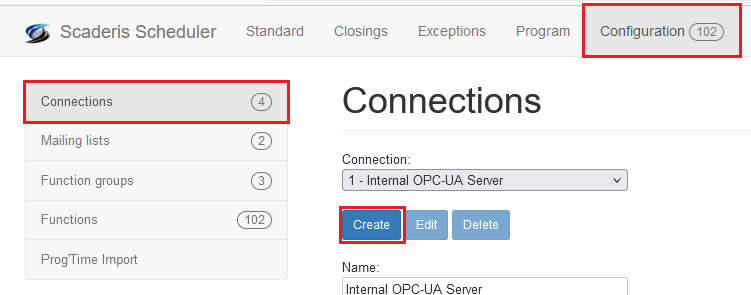
Click on the "Configuration" menu, then on the "Connections" submenu
-
Click on the "Create" button
-
In the "Description" field, enter the connection description
-
In the "OPC Url" field, enter the OPC-UA server address as displayed in the SMC during the OPC-UA service deployment
-
In the "Username" and "Password" fields, enter the connection information for an Aveva account authorized to modify an attribute value

Test a Function Connected to the System Platform
To test a function connected to the System Platform:
-
First create a $UserDefined derived object with an SP attribute of type Integer, then create an instance


-
In the "Scheduler Dashboard", define a function connected to the attribute of the previously created object
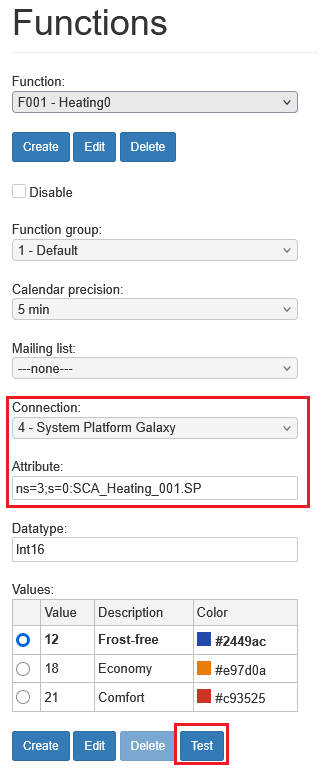
-
Click "Test"
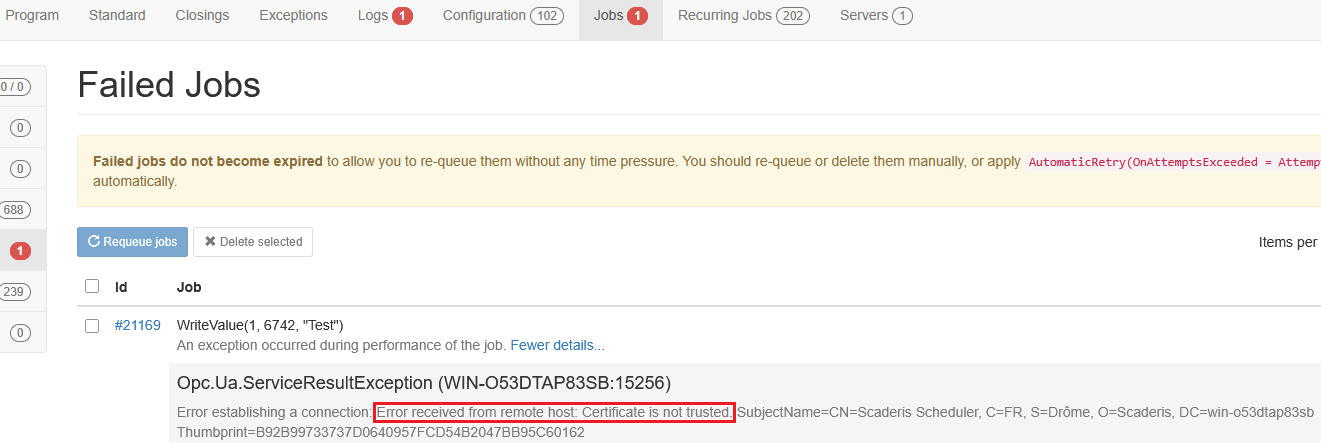

-
Select "Local Machine"
-
Select the option "Place all certificates in the following store"
-
Select "Trusted People"
-
Click "Next"
-
Click "Finish"
-
The following message appears
-
Run the function test again
-
Check the attribute update via an Object Viewer
