Connection from Aveva InTouch
Before attempting to configure a connection to the OPC-UA server from another software, first verify that you can connect using the UAExpert software from the third-party software computer.
Configuring Aveva OI Gateway
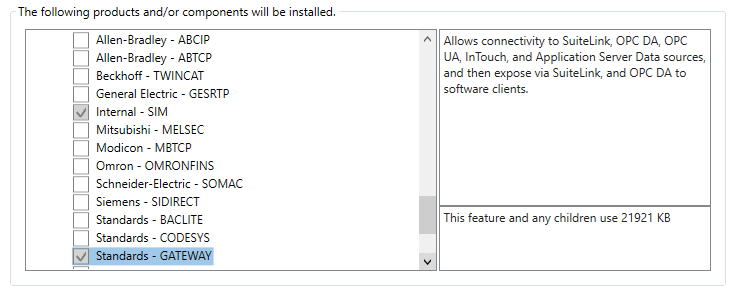
Prerequisite: The "Standards – Gateway" Communication Driver Pack must be installed on one of the OI servers.
On the OI.GATEWAY server, add an OPCUA connection.
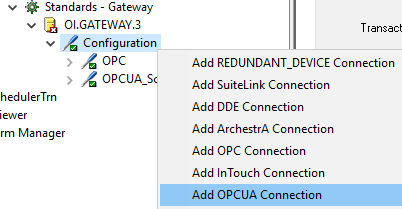
In the example below, we will call this connection "OPCUA_Scheduler".
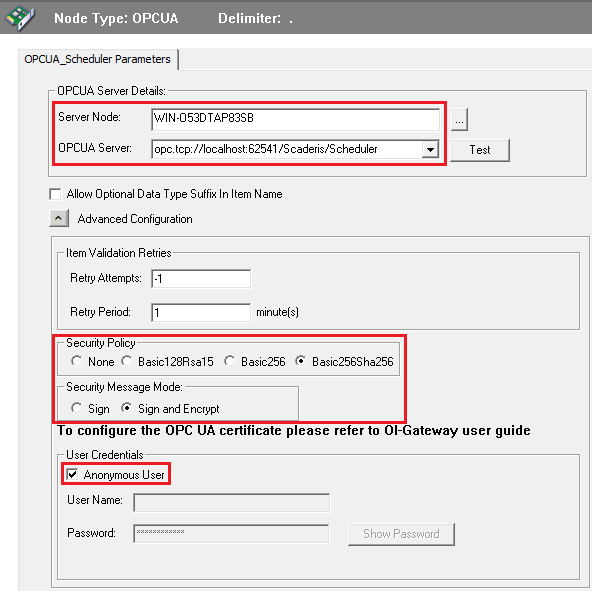
Fill in the following fields:
- Server Node: Name of the server where the "Scheduler Processor" service is installed
- OPCUA Server: Address of the OPC UA server on the machine where the "Scheduler Processor" service is installed
- Security Policy: Basic256Sha256
- Security Message Mode: Sign and Encrypt
- User Credentials: Check "Anonymous User"
This configuration corresponds to the default recommended configuration of the internal OPC UA server of the "Scheduler Processor" service. However, it is possible to modify the configuration of the internal OPC UA server in the OPCUAServer.Config.xml file located at the root of the "Scheduler Processor" installation directory.

Once the configuration is complete, click the "Test" button.

During the first connection test, if you get this popup (secure connection), verify all the steps.
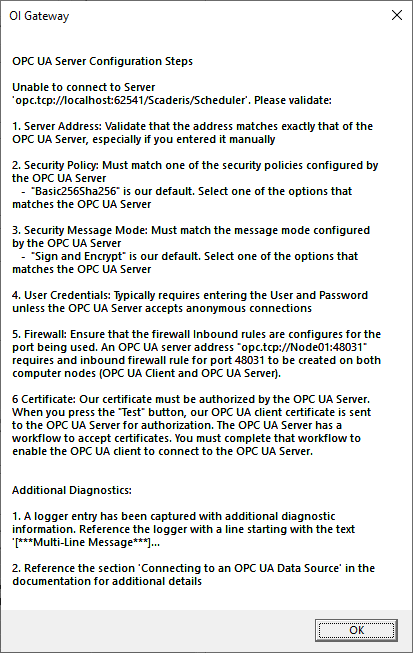
Every first connection to an OPC-UA server from another client software or from another client computer systematically fails because the certificate is not approved on the OPC-UA server side.
For step 6, go to the directory C:\ProgramData\Scaderis\Scheduler\pki\rejected\certs.

If all previous steps are valid, you will find a rejected certificate at the date/time when you clicked "Test".
Copy this certificate to C:\ProgramData\Scaderis\Scheduler\pki\trusted\certs.

Perform a new connection test:
You should obtain the following result in the OPC UA Namespace.

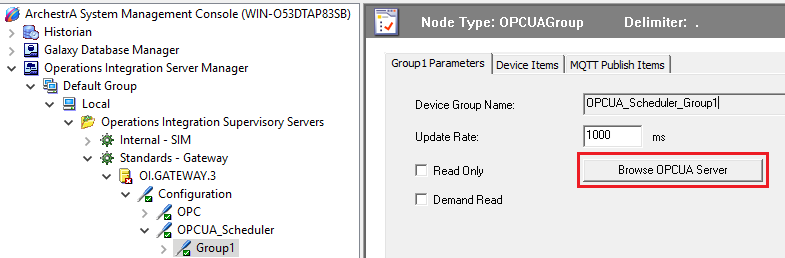
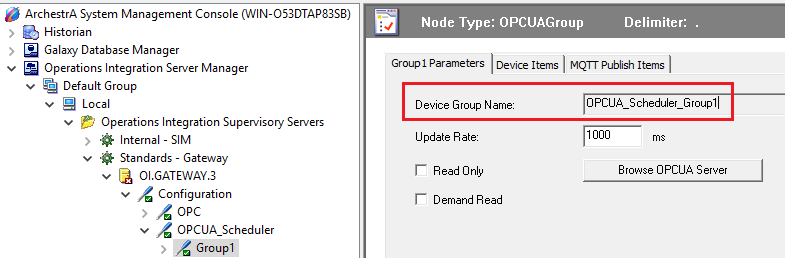
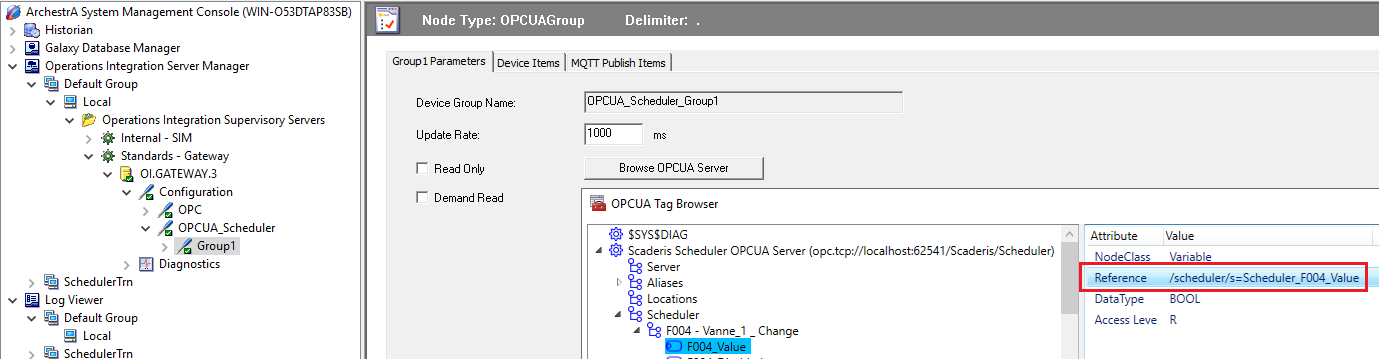
Next, add an OPC UA connection group that we will call "Group1".

Click on "Browse OPCUA Server" (make sure beforehand that the "Scheduler Processor" service is active and that there are no errors in the service logs).
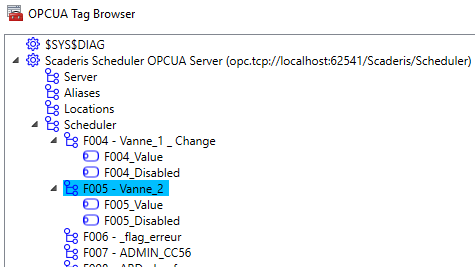
The OPCUA Tag Browser window allows you to navigate through the tree structure of the internal OPC UA server of the "Scheduler Processor".
You can now start the OI Gateway.
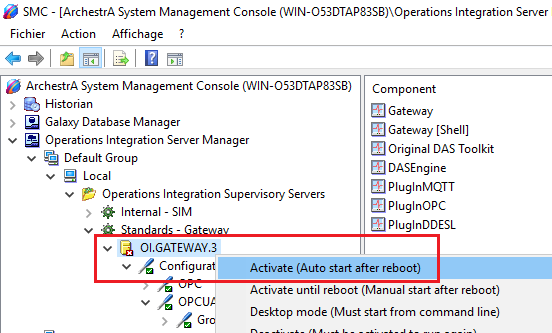
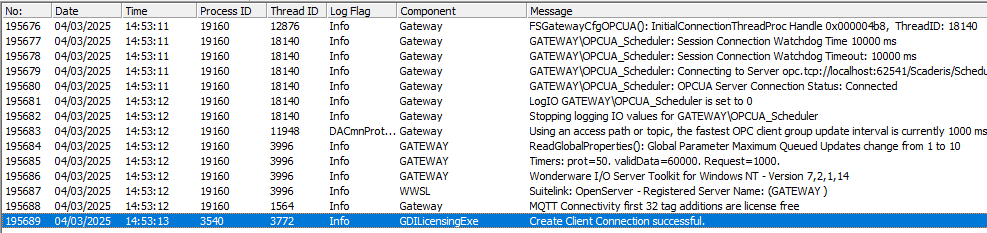
Verify the Gateway starts without errors.
Configuring the OPC UA Access Name
Go to Tools > Access Names.

Select "OPCUA", then "Modify".

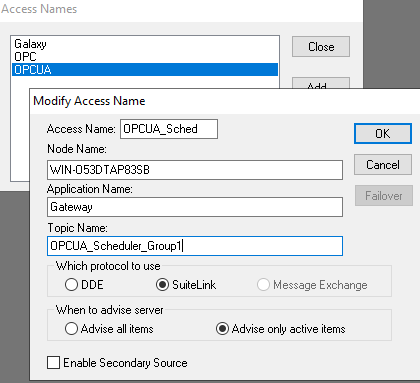
- Access Name: Name of the accessor from InTouch
- Node Name: Name of the server hosting the OI Gateway configured earlier to connect to the internal OPC UA server of the Scheduler
- Application Name: Gateway
- Topic Name: Name of the "Device Group Name" configured earlier on the OI Gateway to connect to the internal OPC UA server of the Scheduler
Configuring a Test InTouch Tag
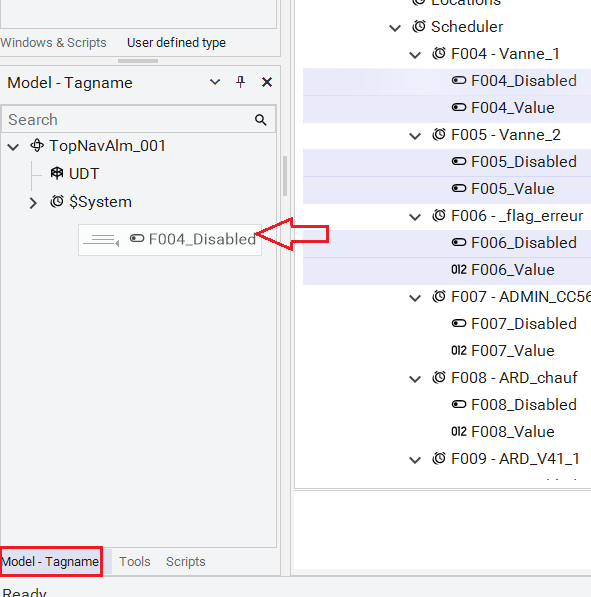
From InTouch 2023 R2 version onwards: In the InTouch navigation bar, go to "Tag dictionary" > "External providers".

The following window appears:
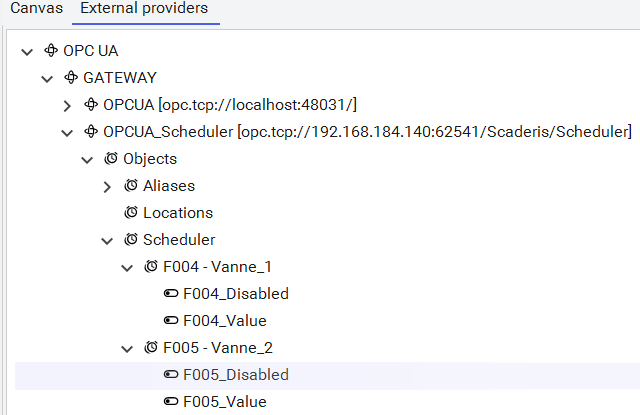
You can now drag and drop into the "Model Tagname" tab to automatically create the Tags in the variable dictionary.

Before InTouch 2023 R2 version: Identify an OPC UA address via the internal OPC UA client of the OI Server (configured earlier).
Open the "Tag Dictionary", then click "New".
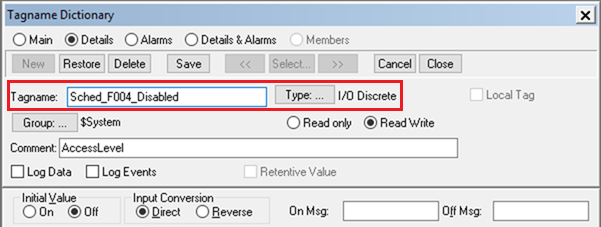
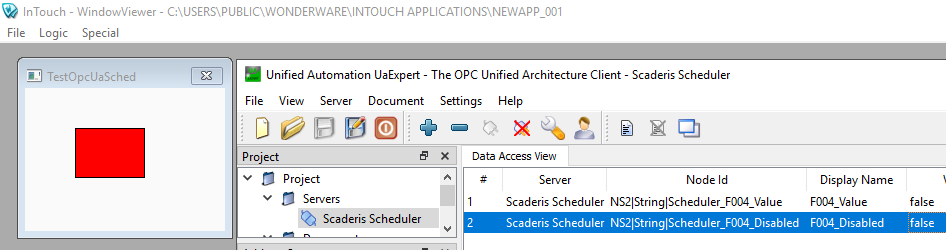
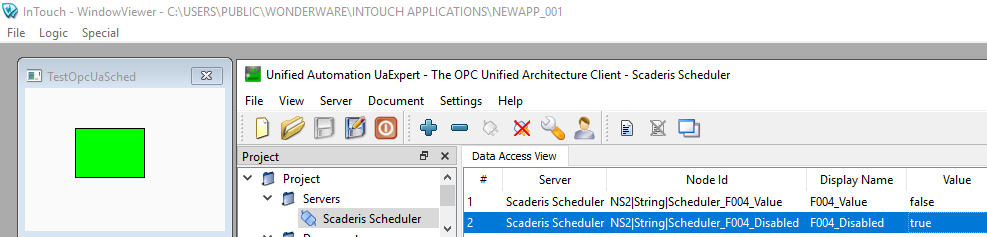
Create a test Tag "Sched_F004_Disabled" of type I/O Discrete.
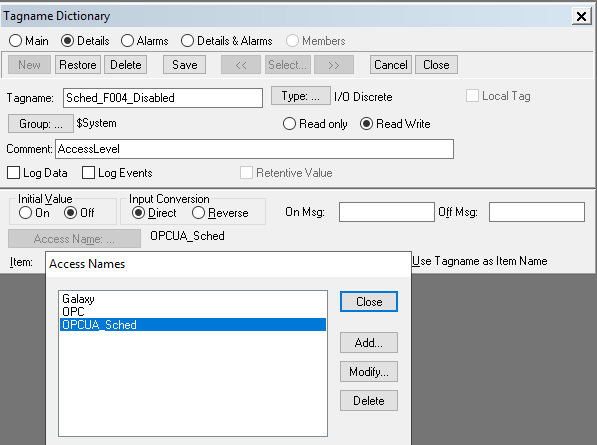
Select the "Access Name" "OPCUA_Sched", then enter the OPC UA Tag address.
![]()
Create a window containing a rectangle with a fill animation based on this new Tag.
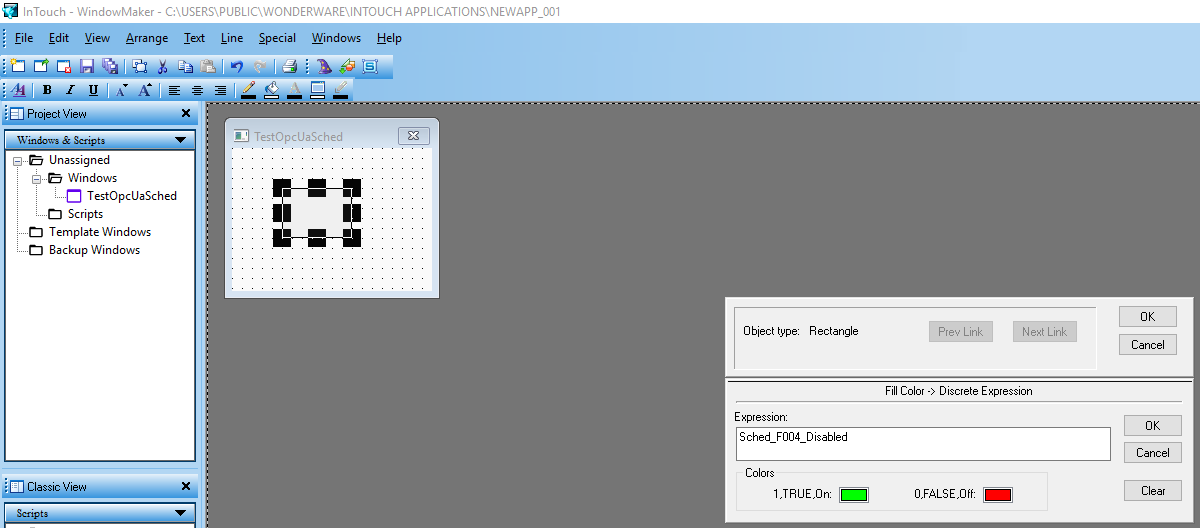
Run the InTouch application and test the Tag change with UA Expert.